A Simple Turntable Set Up Guide For Beginners
Welcome to this Turntable Setup Guide for Beginners. You bought a turntable and stumbled across this turntable setup guide. Maybe it’s new. Maybe it’s from your uncle’s garage. Doesn’t matter. What matters is you’re here, and it’s not plugged in yet.
This Turntable Setup Guide for Beginners walks you through the setup, step by step, in plain English. No nerdspeak. No snake oil. Just what you need to start spinning records without frying your gear or your nerves.
What You Need (And What You Don’t)
Let’s get one thing straight: you don’t need to spend thousands on cables or a gold-plated mat. But you do need a few key pieces. Here’s what to check off:
Turntable (obviously)
Cartridge (some turntables come with one, some don’t)
Phono preamp (built-in or separate)
Amplifier or powered speakers
Speakers (if using a regular amp)
Cables (usually RCA)
That’s it. If someone tries to sell you more, nod politely and leave
Step 1: Place It Right
The surface matters. No wobbly tables. No subwoofers underneath.
Keep it level. Use a bubble level if you have one. Books or shims work if the table’s off.
Avoid:
Wobbly furniture
Near windows
On top of speakers
Worn-out IKEA shelves
Best options:
A stable, heavy table
A dedicated audio rack
A wall-mounted shelf (if you’re fancy)
Step 2: Set Up the Platter and Belt
If your turntable has a belt drive, the belt usually goes around the motor spindle and platter. Some come pre-installed; some don’t.
Steps:
Place the platter on the spindle.
Loop the belt around the inner ring of the platter and motor spindle.
Spin it by hand once to make sure it moves freely.
If it’s a direct drive, you skip this part. No belt to fuss with.
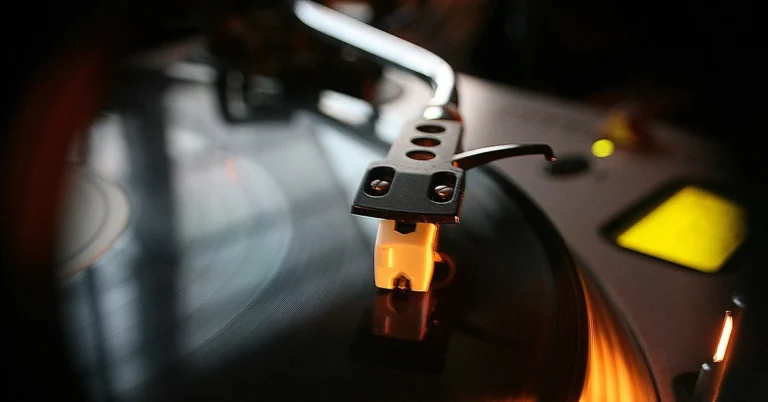
Step 3: Attach and Align the Cartridge
Some tables come with the cartridge installed. If yours doesn’t:
Screw it into the headshell.
Connect the tiny colour-coded wires (use tweezers if needed).
Use an alignment protractor. Many come with your table, or you can print one online.
Goal: The stylus sits at the right angle to hit the groove cleanly. It’s fussy, yes. But once it’s dialled, you don’t mess with it again.
As a side note, a Cartridge manufacturer I have always been happy with is ORTOFON. (This is not an AD) Cartridge.
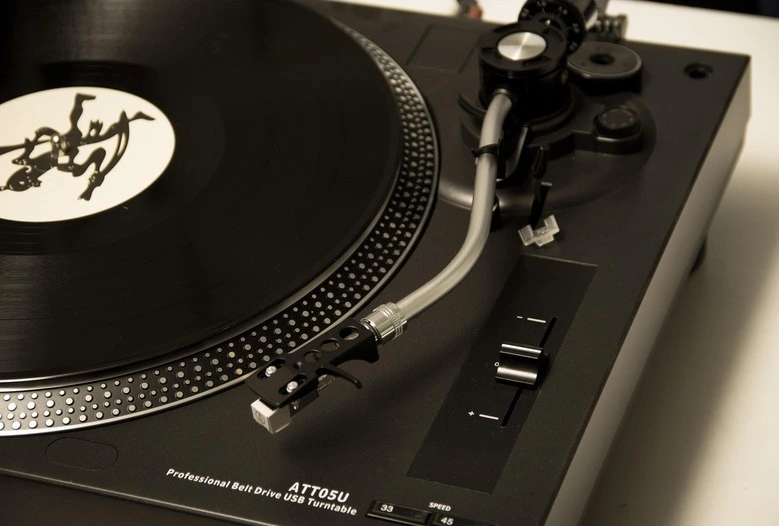
Step 4: Balance the Tonearm
Skip this, and your records will suffer.
Steps:
Make sure the anti-skate is at zero.
Unlock the tonearm.
Turn the counterweight until the arm floats level.
Set the tracking force dial to zero without moving the weight.
Now turn both the dial and the weight to your cartridge’s recommended force (usually 1.8–2.2 grams).
Set anti-skate to match the tracking force.
That’s it. This keeps the stylus from either digging into the vinyl or skating across it like a drunk deer.
Step 5: Connect the Cables
Now we hook it up.
Scenario 1: The Turntable has a built-in preamp
→ Plug RCA cables directly into your powered speakers or amp.
Scenario 2: The turntable needs a phono preamp
→ Plug the turntable into PHONO IN on an amp or a separate preamp box.
→ Then plug the preamp into speakers or amp’s LINE IN.
Don’t mix up phono and line signals. If you do, it’ll either sound tiny or blow your speakers. Double check.
Ground wire?
If there’s a hum, connect the ground wire from the turntable to the amp or preamp. Not all setups need it.
Step 6: Dust Off a Record and Drop the Needle
Start with a clean record. Cue the tonearm. Lower it gently.
Don’t touch the needle with your hand. Ever.
Now turn it up.
You did it!!
Common Questions (That Everyone Has But Pretends They Don’t)
Q: What’s the difference between phono and line out?
Phono needs a preamp to boost the weak signal and apply RIAA equalisation. The line is already boosted.
Q: Can I use Bluetooth speakers?
Only if your turntable supports Bluetooth. Otherwise, no.
Q: Do I need special speakers for vinyl?
No. Any speaker’s work, as long as you connect everything properly.
Q: My record sounds weird. What’s wrong?
Could be:
Dust on the record
Needle tracking is too light or too heavy.
Wrong speed (check the switch)
Plugged into line instead of phono or vice versa
Q: How do I clean a record?
Use a carbon fibre brush before every play. For deep cleaning, get a record cleaning solution and a microfiber cloth. Or a machine, if you’re flush.
Q: How often should I replace the stylus?
Every 500–1000 hours. If it sounds dull or distorted, check it.
Pro Tips (For Later, Not Now)
Buy a record brush: It’ll save your stylus.
Keep the dust cover closed: When not playing. Not while spinning.
Don’t stack gear on your turntable: Even if it “fits.”
Label your cables: It helps later, trust me.
Upgrade slowly: Start with what you have. Upgrade speakers or preamp when you can tell the difference.
Last Words Of ThisTurntable Setup Guide for Beginners
Don’t overthink it. Vinyl’s not fragile, but your patience might be. Take your time, follow the steps, and trust your ears. It’s supposed to be fun, not homework.
There’s nothing quite like that first clean drop of the needle. You’ll hear things you didn’t know were there. You’ll feel it.
And now you’re ready.
Welcome to the club. Don’t forget to flip the record.
Did You Find This Turntable Setup Guide for Beginners Helpful?
If you found this turntable guide helpful, you can let me know by messaging me on the CONTACT Page.